
Basic Oscilloscope Self-Test Procedure for Tektronix TDS Series
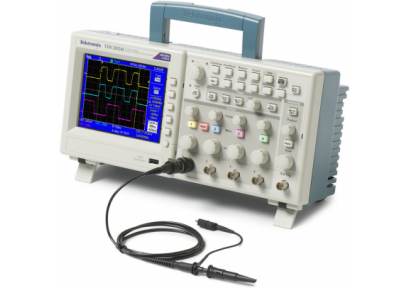
This article is a general summary of a basic self-test and self-calibration of the TDS series scopes from Tektronix. Most TDS scopes will perform a self-test and a probe path compensation calibration. These two tests along with clearing the memory will give a very good idea that the unit is functioning properly. All of these oscilloscopes are roughly the same depending on which series of TDS scope it is, when it was built and if it is windows based. This walk through is for the non-windows based units which can be purchased at very reasonable prices. These steps can be applied, the path is the same but completed with a mouse or touch screen through menus, rather than key presses.
Learn more about Tektronix here
Procedure Details:
1.) Apply power to the TDS and allow to warm up for at least 15 minutes.
2.) Ensure there are no signals or cables connected to the device.
3.) Locate and press the “Utility” button. In some cases this is a shift function. In this case press “Shift” and then “Utility”.
4.) This will display functions of the soft keys at the bottom and left side of the display.
5.) Locate and press the soft key [TEK SECURE ERASE].
6.) Locate and press the soft key [OK Erase Setup & Ref Memory]. Allow the unit to perform this function. Once the unit has completed the function the unit will display a message stating the following: Tektronix Secure Operation Complete. All wave form memory and set up has been erased and verified. Press Clear Menu to remove this message.
7.) Press the “Clear Menu” button generally located near the bottom right of the display bezel.
8.) Press the “Utility” button or “Shift” button then “Utility” button depending on your model TDS scope.
9.) Press the soft key [SYSTEM CONFIG]. Config will be highlighted in the menu.
10.) Press the [SYSTEM CONFIG] soft key three times to highlight Diag/ Err.
11.) Press the [EXECUTE] soft key located on the bottom row of soft keys.
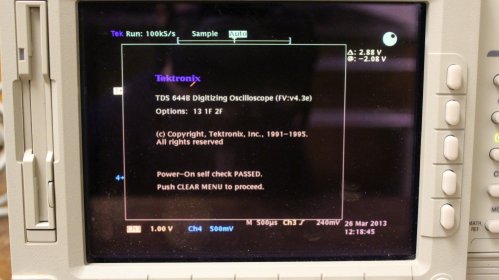
12.) Press the soft key [OK Confirm Run Test]. The scope will go through the self-tests it performs at power up along with a few other more in depth tests. Once the unit has finished the process the power on splash screen will appear. And will return to normal scope operation if no faults have been found. If the unit does encounter a fault this failure along with a brief description and error code will be displayed.
13.) Press the “Utility” button or “Shift”, “Utility” depending on your model.
14.) Press the [SYSTEM CONFIG] soft key twice to highlight CAL. On some scopes it will be called SPC.
15.) Press soft key [OK COMPENSATE SIGNAL PATHS]. Unit will then run the procedure. The unit will not respond to any input from the user until the calibration is complete. This could take up to 10 minutes. Once complete if the unit has encountered a fault it will be displayed. If no fault is found the unit will have a trace again displayed along with the utilities soft keys.
16.) Press the “Clear Menu” button to return to normal operation.
Learn more about the Tektronix TDS series Oscilloscopes.
Hope you find this information helpful. Should you need repairs or calibration for these Tektronix oscilloscopes please contact us.
Latest posts by Mike Novello (see all)
- Used Bio-Rad Gel Doc XR For Sale - March 9, 2022
- CONSULTIX WTX-35-A4 CW Test Kit For Sale - November 9, 2021
- Biologic SP-150 Single Channel Potentiostat and VMP3B-80 Booster For Sale - September 7, 2021